Good morning and who was up at silly o clock today. Yes me. I do love a Friday but 4am is a little too early and very cold. I hope to get another hours sleep after lunch time as meeting with friends tonight to do a little crafting, if I can remember how.
Here are some cards that were made a while ago. A few people have asked me how I did them so here goes:
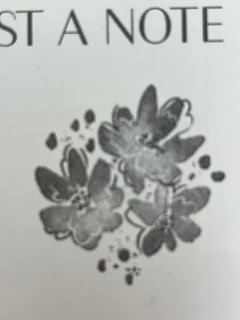
I used the Stampin' Up! Stamp set called Flowing Flowers, there are more details below in the products section.
I made up a C6 base card with Thick Basic White card. Using the stamparatus and the smaller stamp, I placed my card inside the Stamparatus, held it down with magnets and fiddled about with the stamp until I got it in the place I wanted it to be. I only wanted to ink up the leaves.
Using a sponge dauber and Old Olive ink I put ink onto the leaves
I placed the cut out flower onto my card so that I could judge where to position the next stamp on the Stamparatus.
Once I was happy with the position, I moved the large flower template away and inked up the stamp with Night of Navy ink
Once I put the large flower template back onto the card, you can see that there is an area of green leaf missing so I just went back in with the dauber
You dont really notice this on the finished card but I bet you will go and have a look at it now.
I inked up the large flower again, in Calypso Coral and stamped the image on to the card. You can do this in the Stamparatus but I was happy not using it this time.
I have never been very good at using gold guilded leafing but I really do love the effect so I decided to go with 'less is best' I put a little glue onto the stamped out and cut large flower and sprinkled the gold guilded leafs onto it. I put it to one side for 10 minutes to dry. I then rubbed them off with a little sponge but I have been told a childs soft toothbrush would work so I will try this and let you know.
I then wanted some gold guilded leafing on the actual card so I did the same thing again, a little glue, added the leafing, waited 10 minutes and then rubbed them off.
Once the leafing was dry I stamped out the sentiment.
As you can see, I stamped directly onto two of the cards. The third card, which doesnt have the guilded leafing, has a Calypso Coral card base and I layed the stamped images on top
If you are not too sure about using the guilded leafing, we are having a get together 'Stampin' Social' in May using this. Why dont you come along and try it out. Details will be on the blog in the next week or so.
Thank you for having a read today, I hope you have a fantastic Friday. Tracey x
Promotions and special offers from Stampin' Up! are all below. You may need to click on them to make them a little bigger to read.
Click on the image below to look through the Annual Catalogue and the spring mini
Click on the link below to see the Last Chance Products that are only available whilst supplies last


No comments:
Post a Comment